
Networking & Communications |
|||||||||||||||||||||
| Objective :: | |||||||||||||||||||||
The main objective of this project is to establish the connection between Arduino to NodeMCU & NodeMCU to Arduino through Serial communication i,e. Audrino UNO to ESP8266 and ESP8266 to Audrino UNO with the help of DHT22 sensor which will transfer DHT22 Sensor data from Arduino to NodeMCU and NodeMCU to Arduino. Serial communication is required when you want to transfer sensor data or any data from one device to another device. In this case it is ESP8266 NodeMCU and Arduino. Moreover, we will transfer DHT22 Sensor data from Arduino to NodeMCU and NodeMCU to Arduino. Apart from this we will also see how to use software serial library on Arduino and Serial1 on ESP8266 NodeMCU, So that you can transfer data with another serial port, which we will be helpful.
This assignments is basically based on the Serial communication between the Arduino and Nodemcu esp8266 wifi module. As you know in Nodemcu esp8266 wifi module we have only one Analog pin and have less number of Input/Output pins, to increase the number of Analog pins and digital pins the best choice is to connect the Nodemcu module with the Arduino Uno or Mega.
Networking is the exchange of information and ideas among people with a common profession or special interest, usually in an informal social setting. Networking often begins with a single point of common ground. A network protocol includes all the rules and conventions for communication between network devices,including ways devices can identify and make connections with each other.There are also formatting rules that specify how data is packaged into sent and received messages.
Data communications refers to the transmission of this digital data between two or more computers and a computer network or data network is a telecommunications network that allows computers to exchange data. The physical connection between networked computing devices is established using either cable media or wireless media. The best-known computer network is the Internet. The physical connection between networked computing devices is established using either cable media or wireless media.The best-known computer network is the Internet. The field of networking and communication includes the analysis, design, implementation,and use of local, wide-area, and mobile networks that link computers together.The Internet itself is a network that makes it feasible for nearly all computers in the world to communicate.
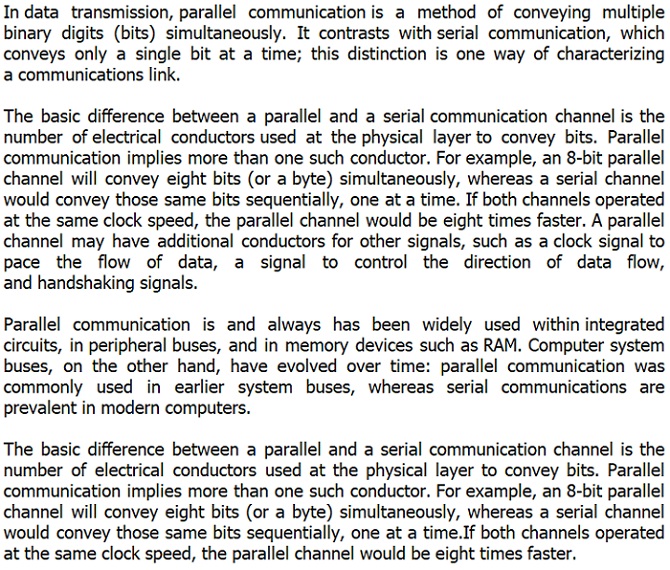
In data transmission, parallel communication is a method of conveying multiple binary digits (bits) simultaneously. It contrasts with serial communication, which conveys only a single bit at a time; this distinction is one way of characterizing a communications link. The basic difference between a parallel and a serial communication channel is the number of electrical conductors used at the physical layer to convey bits. Parallel communication implies more than one such conductor. For example, an 8-bit parallel channel will convey eight bits (or a byte) simultaneously, whereas a serial channel would convey those same bits sequentially, one at a time. If both channels operated at the same clock speed, the parallel channel would be eight times faster. A parallel channel may have additional conductors for other signals, such as a clock signal to pace the flow of data, a signal to control the direction of data flow, and handshaking signals. Parallel communication is and always has been widely used within integrated circuits, in peripheral buses, and in memory devices such as RAM. Computer system buses, on the other hand, have evolved over time: parallel communication was commonly used in earlier system buses, whereas serial communications are prevalent in modern computers.
|
|||||||||||||||||||||
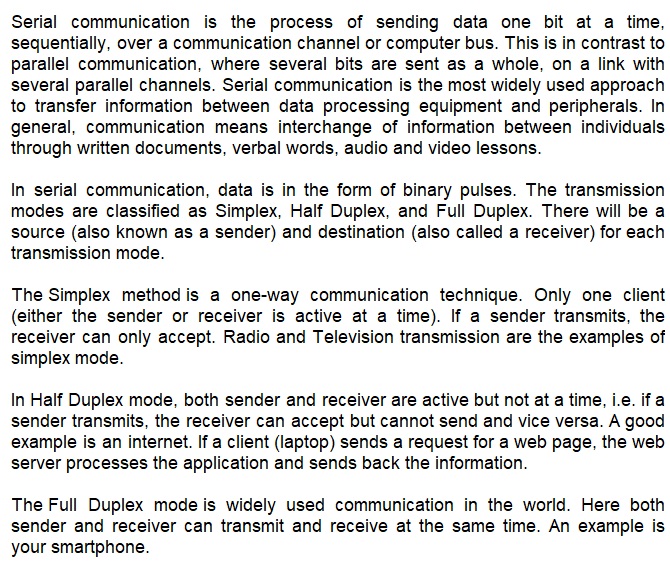
In serial communication, data is in the form of binary pulses. In other words, we can say Binary One represents a logic HIGH or 5 Volts, and zero represents a logic LOW or 0 Volts. Serial communication can take many forms depending on the type of transmission mode and data transfer. The transmission modes are classified as Simplex, Half Duplex, and Full Duplex. There will be a source (also known as a sender) and destination (also called a receiver) for each transmission mode.
In Embedded system, Serial communication is the way of exchanging data using different methods in the form of serial digital binary. Some of the well-known interfaces used for the data exchange are RS-232, RS-485, I2C, SPI etc.
We will transfer DHT22 Sensor data from Arduino to NodeMCU , NodeMCU to Arduino through Serial communication. |
|||||||||||||||||||||
In this assignment, I am doing serial communication between Arduino to ESP8266 & ESP8266 to Arduino. Serial communication is required when you want to transfer sensor data or any data from one device to another device, In our case it is ESP8266 NodeMCU and Arduino. Moreover, I will transfer DHT22 Sensor data from Arduino to NodeMCU and NodeMCU to Arduino. Apart from this we will also see how to use software serial library on Arduino and Serial1 on ESP8266 NodeMCU, So that we can transfer data with another serial port, which we will be helpful. If you are doing lots of things on both Arduino and ESP8266 NodeMCU. |
|||||||||||||||||||||
| Component Requirements :: | Library Requirements :: | ||||||||||||||||||||
| NodeMCU ESP8266 Arduino UNO |
Jumper Wire Bread Board DHT22 Sensor |
DHT22 Sensor | |||||||||||||||||||
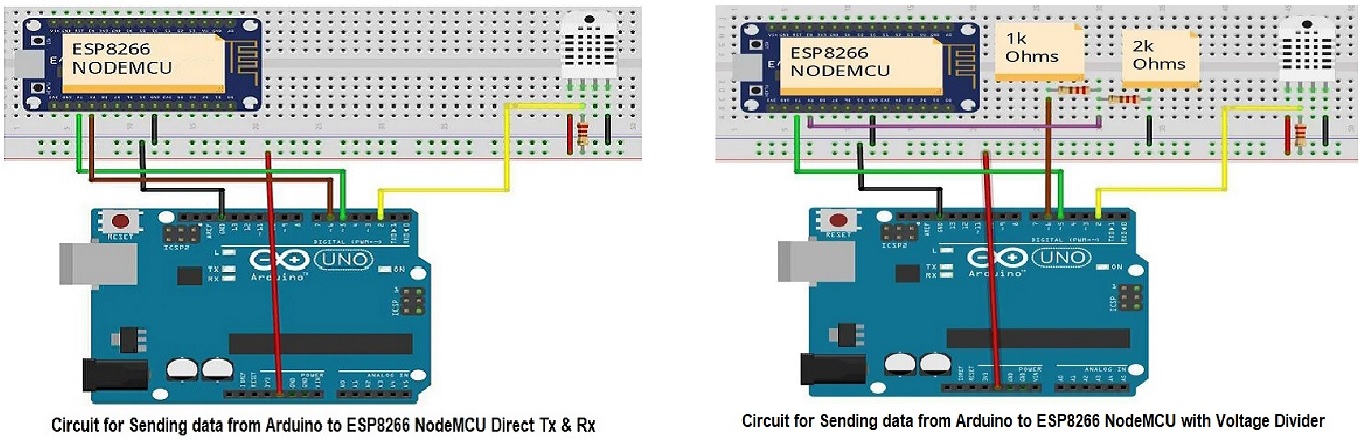
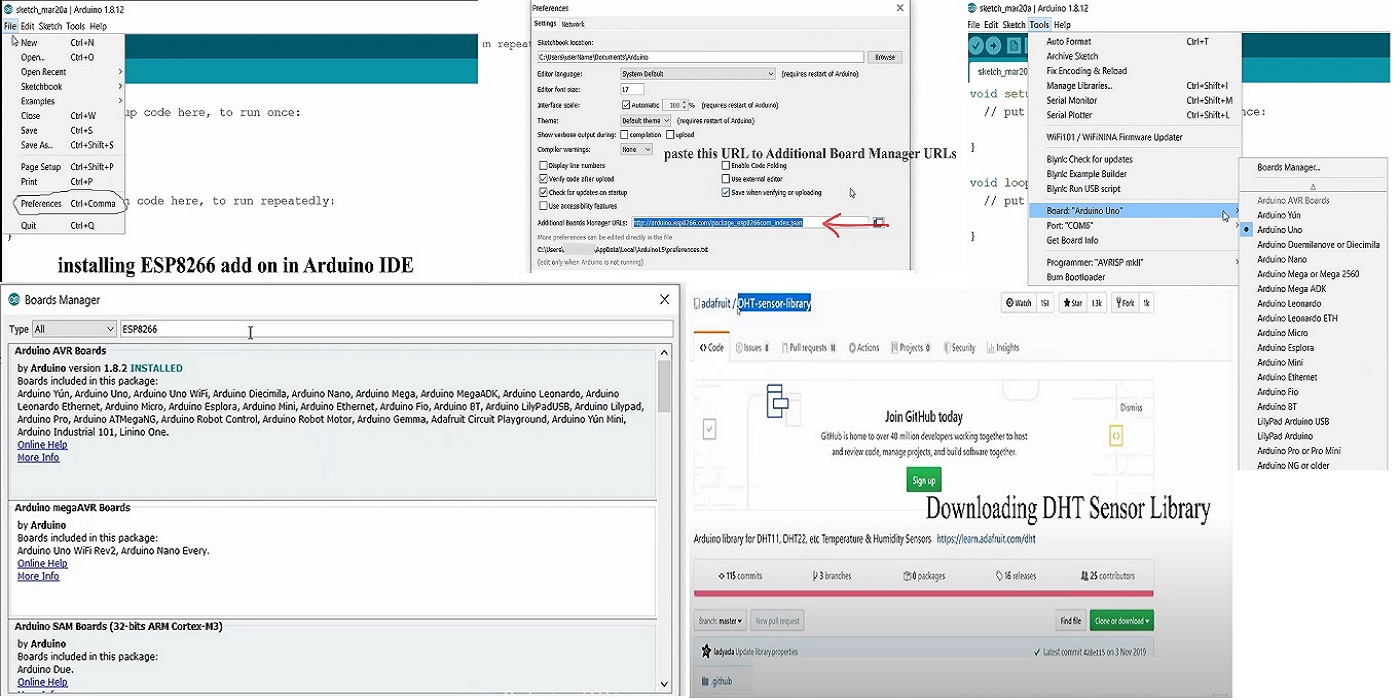
Make sure you already setup ESP8266 for Arduino IDE. If you didn’t setup yet. You can read How to setup ESP8266 for first time in Arduino IDE. As in this project I am transferring DHT sensor data from Arduino to NodeMCU and NodeMCU to Arduino. So I need this library for that sensor to work. Software Serial library: This library is inbuilt in Arduino IDE. You don’t need to install it. Voltage Divider for NodeMCU’s Serial Communication Rx Pin: ESP8266 works on 3.3V and Arduino Tx pin supplies 5V, which can damage your ESP8266 NodeMCU. By using voltage divider you are reducing Arduino Tx 5V to 3.3V for Rx of ESP8266. Unfortunately it didn’t work. It shows blank screen on serial monitor, if it is connected via voltage divider. when I connect direct Arduino’s Tx to NodeMCU’s Rx, it starts showing sensor data. I tried everything to make it work, checked voltage with multimeter. It was 3.3V that means voltage divider connection is correct. In addition to this I tried reducing baud rate but it also didn’t work. In my case voltage divider didn’t work and we know Arduino provide 5V if it is connected to USB or 5V power supply. But you can reduce Arduino’s power supply voltage, so it can provide little low voltage than 5V or near to 3.5 V. |
|||||||||||||||||||||
NodeMCU is great for connecting cloud and arduino is great at talking with different sensors. nodemcu has only one analog pin. In this blog we will see how to connect arduino to nodemcu and post data to a mqtt broker. Arduino will take temperature readings and send the readings to nodemcu over serial connection. Nodemcu will send a test message for every reading it receives. If you have just one sensor to monitor you can directly use the analog input available on nodemcu, see this blog on how to use the analog pin of nodemcu. On Arduino side, we will take sample periodically and send a test message over softserial to nodemcu. Please note that Arduino uno works on 5v and nodemcu works 3v3 level. So you should use a level shifter to connect arduino soft serial pins to the nodemcu uart port (It also works without level converter , but it is not recomended). |
|||||||||||||||||||||
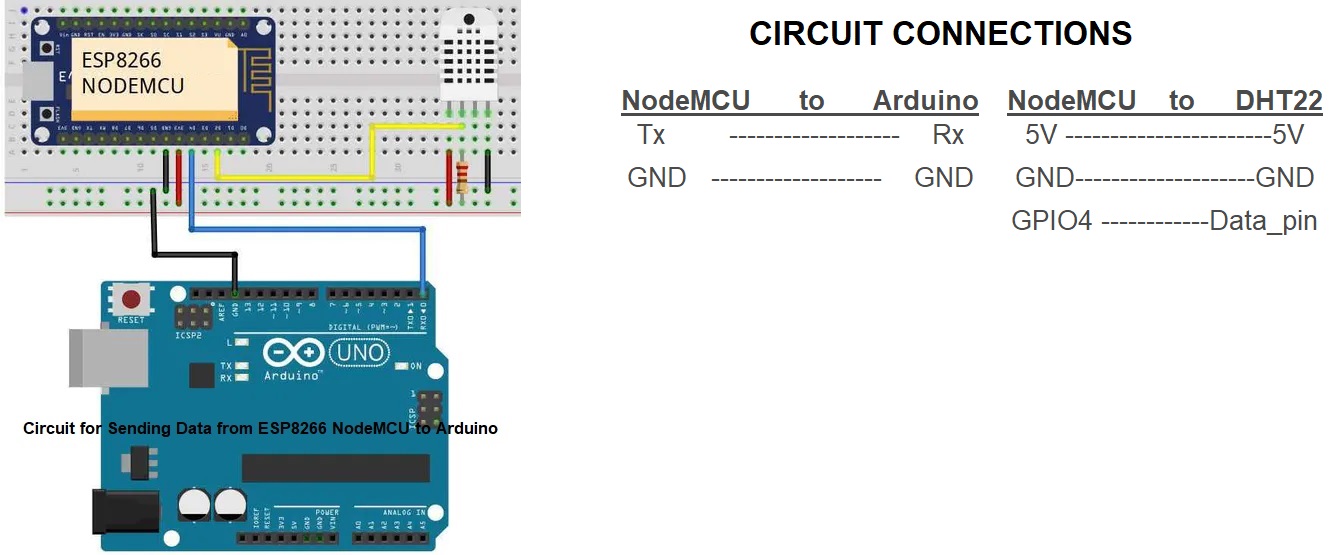
Sending Data from Arduino to ESP8266 NodeMCU: |
|||||||||||||||||||||
Arduino ----------------------------------- NodeMCU |
Arduino ------------------------------------------- DHT22 |
||||||||||||||||||||
5 ---------------------------------------------Tx 6 ----------------------------------------------Rx GND ---------------------------------------------GND |
2 --------------------------------Data_pin 5V ------------------------------------- 5V GND -----------------------------------GND |
||||||||||||||||||||
Now I have connected DHT22 sensor on Arduino Uno. It will transfer sensor data to NodeMCU via serial communication. |
|||||||||||||||||||||
 |
|||||||||||||||||||||
|
|||||||||||||||||||||
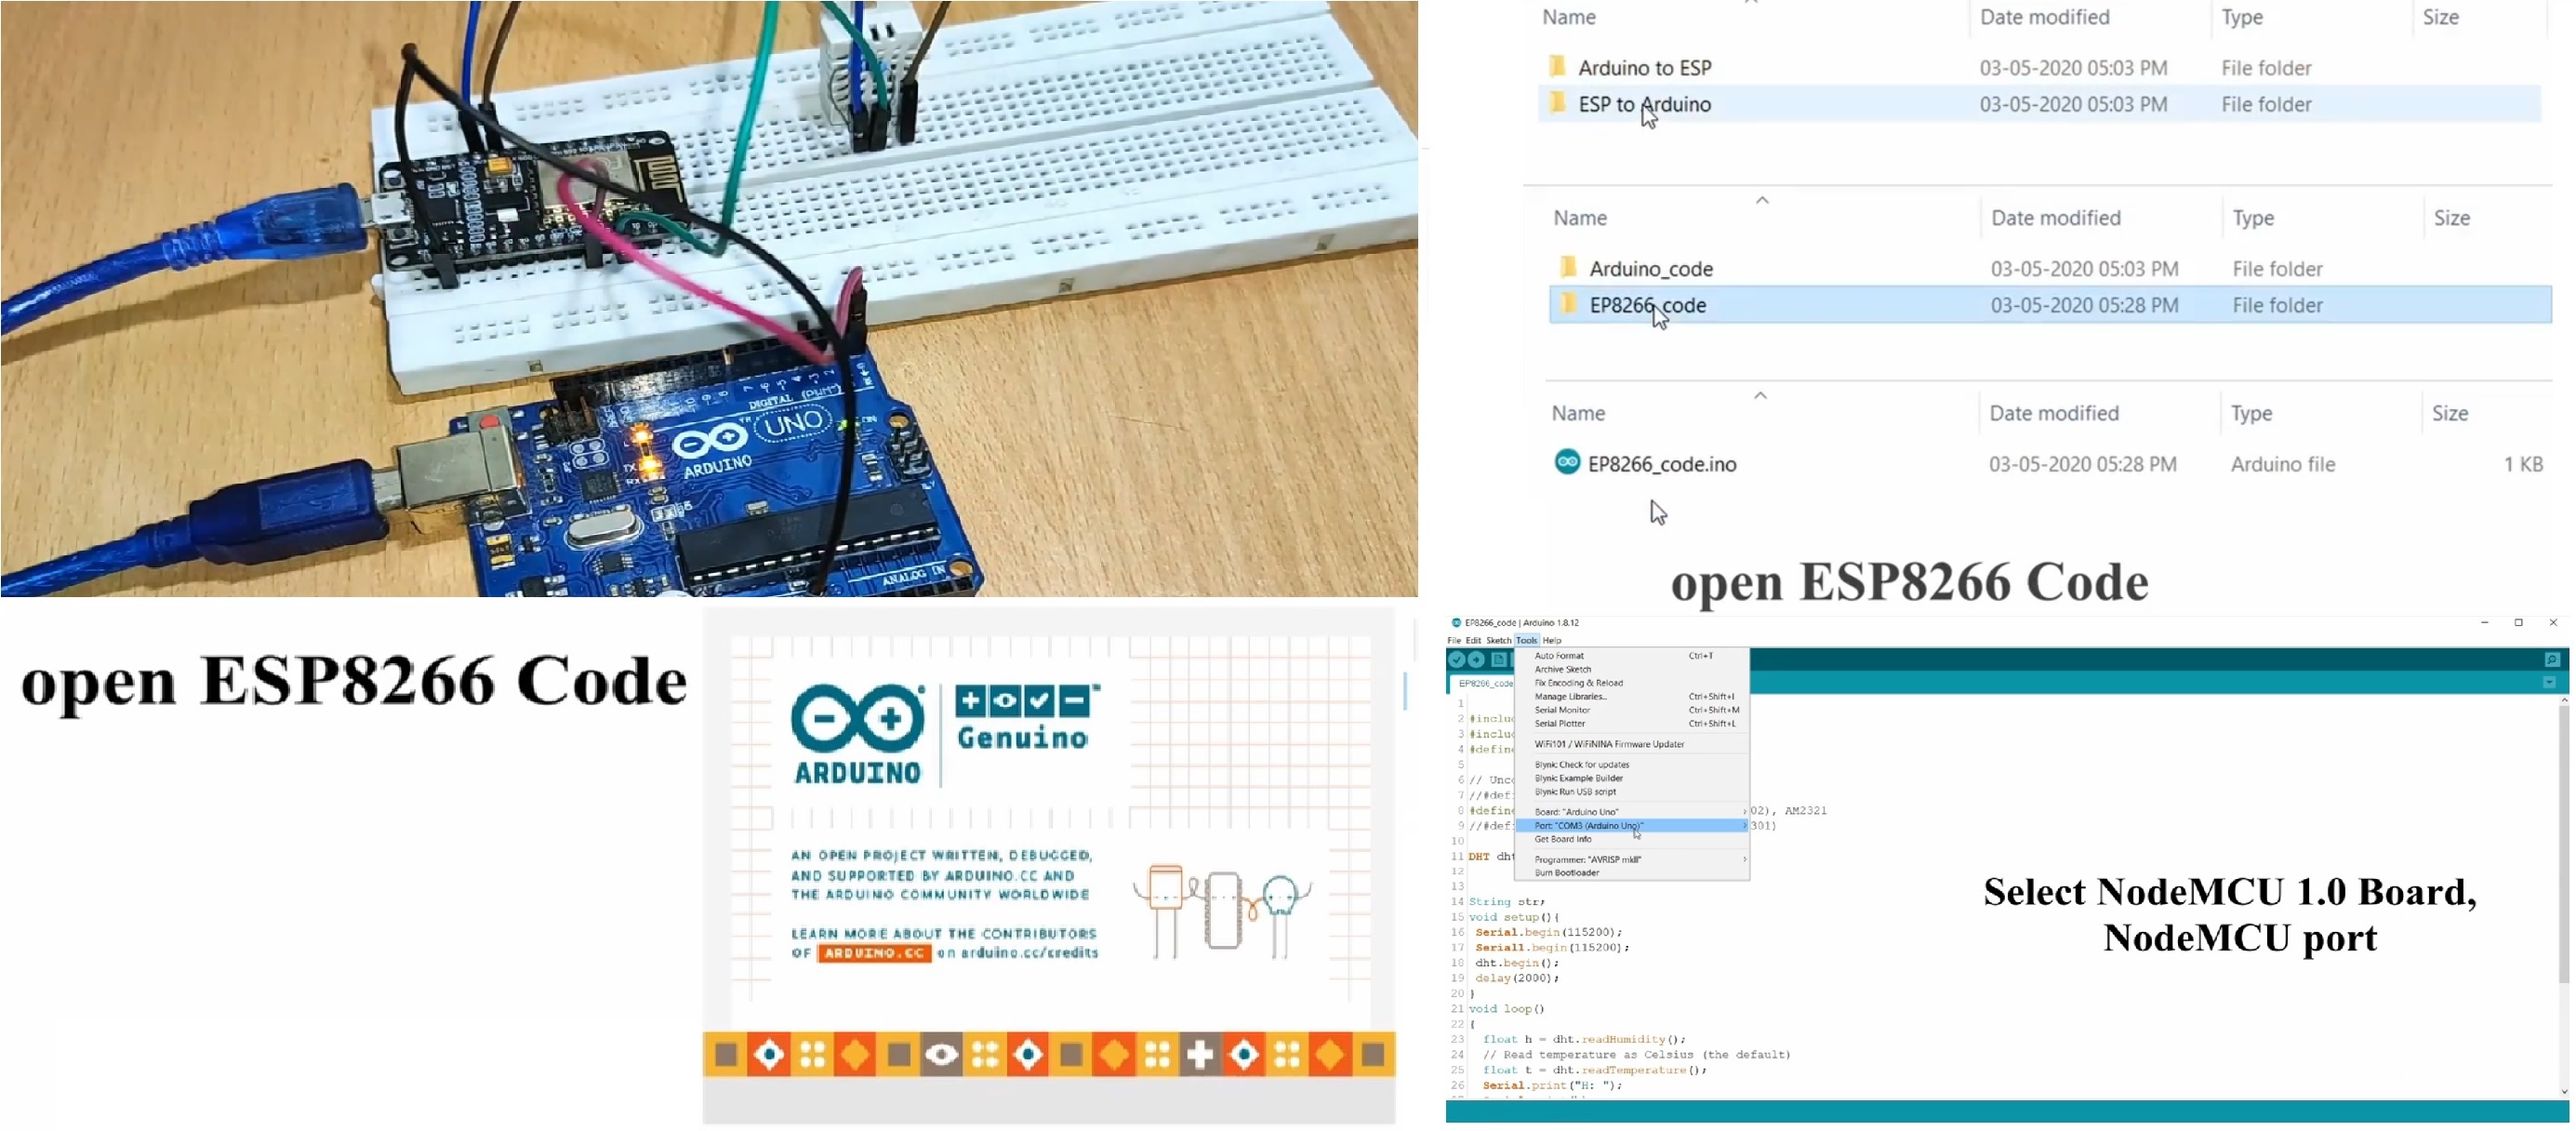
| Setting up of Arduino for ESP8266 : | |||||||||||||||||||||
 |
|||||||||||||||||||||
 |
 |
||||||||||||||||||||
| Sending Data from ESP8266 NodeMCU to Arduino : | |||||||||||||||||||||
| Now I changed the DHT22 sensor pins to ESP8266, so that It will transfer sensor data from NodeMCU to Arduino via serial communication. | |||||||||||||||||||||
 |
|||||||||||||||||||||
Serial1 (Only Tx): Serial1 uses UART1, TX pin is GPIO2. UART1 cannot be used to receive data because normally its RX pin is occupied for flash chip connection. To use Serial1, we have to call Serial1.begin (baudrate). |
|||||||||||||||||||||
 |
|||||||||||||||||||||
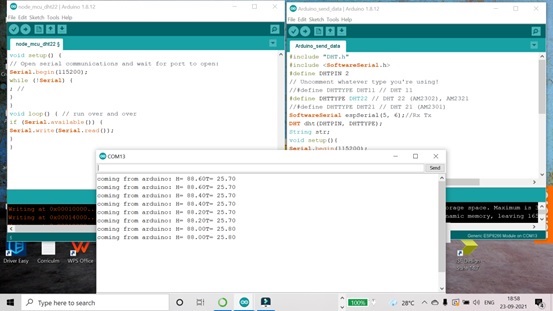
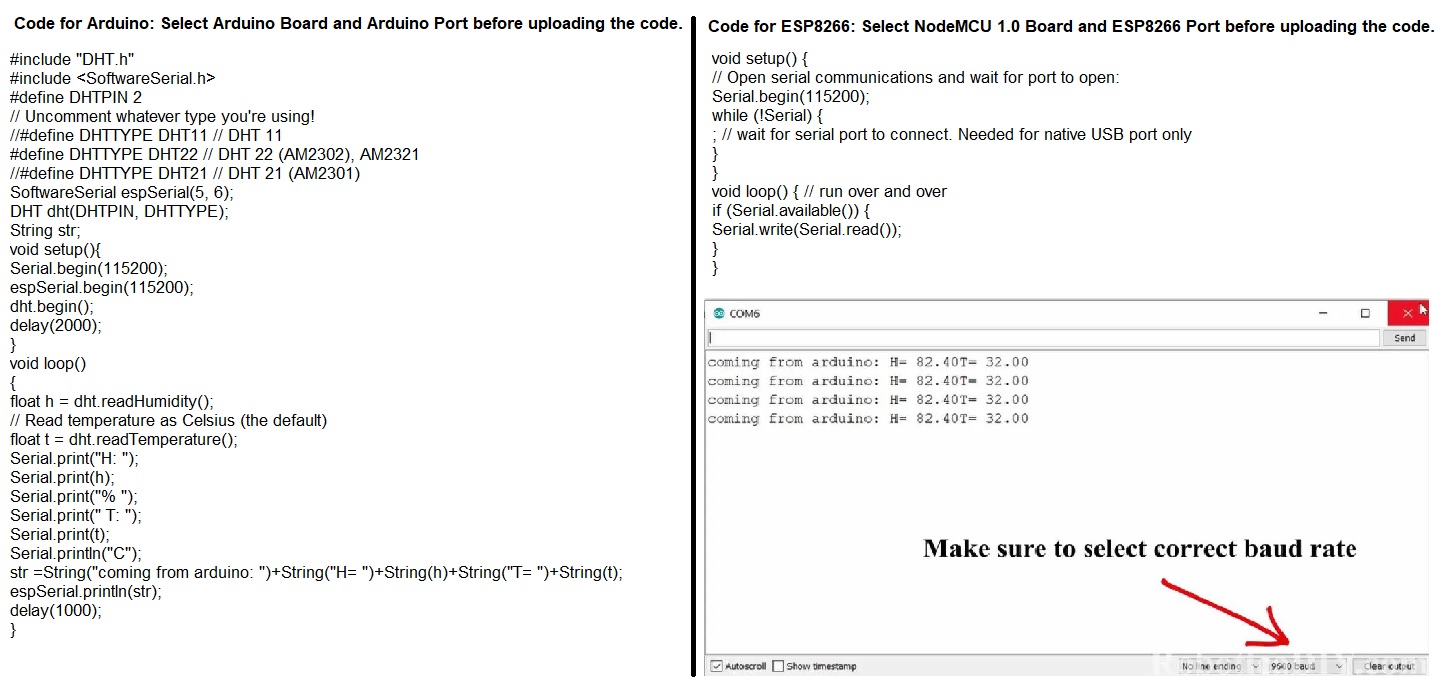
| Code & Testing:: | |||||||||||||||||||||
.jpg) |
|||||||||||||||||||||
| Final Results: | |||||||||||||||||||||
.jpg) |
|||||||||||||||||||||
Final Output |
|||||||||||||||||||||